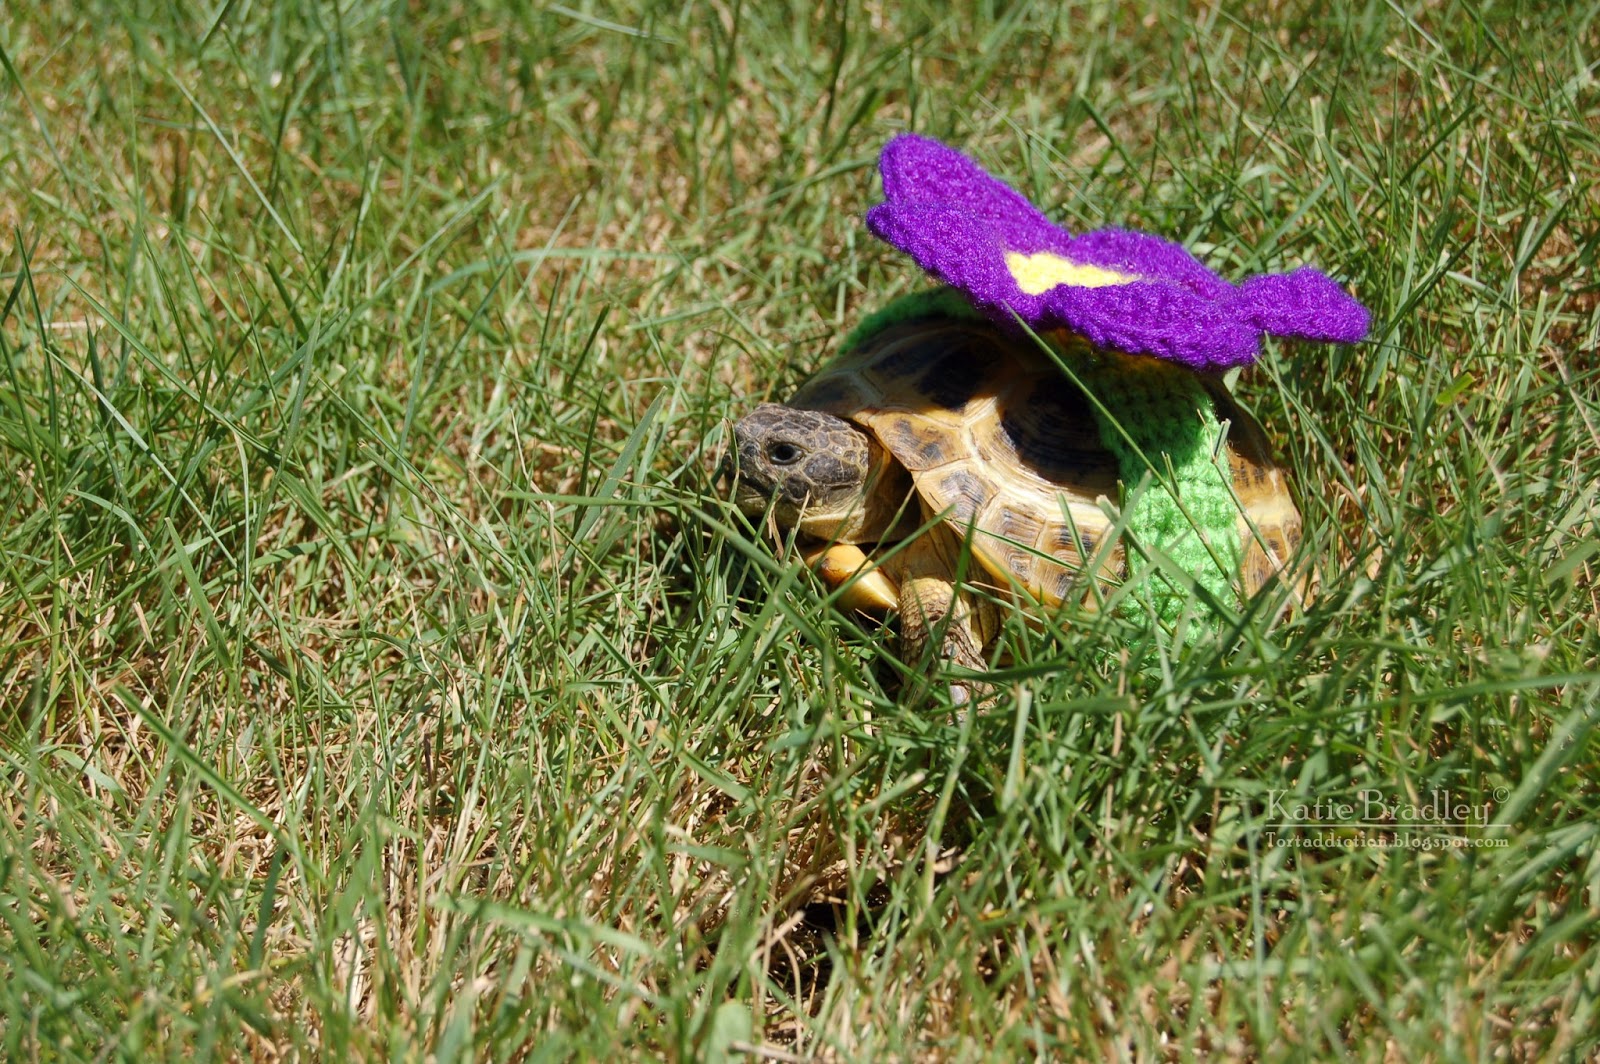
Lady, our newest rescue, was in need of a nice enclosure. For the first month with us, we kept her in an XL cement mixing tub, since she was too large for the rubbermaid bins I usually put new rescues in while they are in quarantine.
 |
| Lady, chowing down on a mix of plantain weed, dandelion, and miner's lettuce |
Tortoises need space to dig, live, eat, explore, bask, and sleep. Ideally, we provide them with an outdoor enclosure where they can spend the warm months. Here in the Pacific Northwest we have a lot of cold rainy days each year, so a good, roomy indoor enclosure is important as well.
People often ask me what the 'minimum size' for a tortoise enclosure is. I tell them, as large as they possibly can make it. The ABSOLUTE minimum is 4ft x 2ft, and this would be for just one fairly small tortoise. In an enclosure this size, I have found that it is difficult to create the micro-climates a tortoise needs (hot basking spot, water dish, cool end, hides, feeding area etc). Owners who keep their tortoise in a small enclosure often complain that their tortoise either paces non-stop, or that the tortoise is 'boring' because it never does anything interesting.
Buying an enclosure large enough has the potential to break the bank - however, there are cheaper, easier, and much more awesome options!
Today I am going to show you how you can make a very nice tortoise table out of a 2nd hand bookshelf.
Step1: buy a shelf. I found this nice 4ft x 3ft oak and oak veneer shelf on Craigslist for $30. It matches our other furniture nicely. The 3 shelves are removable. I used 2 of the shelves to fashion the legs of the tortoise table. I used the remaining one as the roof to the hide box.
 |
| 4ft x 3ft bookshelf... |
Since you are working with a pre-existing shelf, you don't really need to know much about carpentry to do this project. If you don't sink a cement mixing tub into the floor like I did (for deeper digging), you don't even have to worry about creating legs.
I removed the backing, since it was made out of super flimsy material. I had to pull out the staples that fastened it. If the shelf you get has a more sturdy back, then you can leave it on.
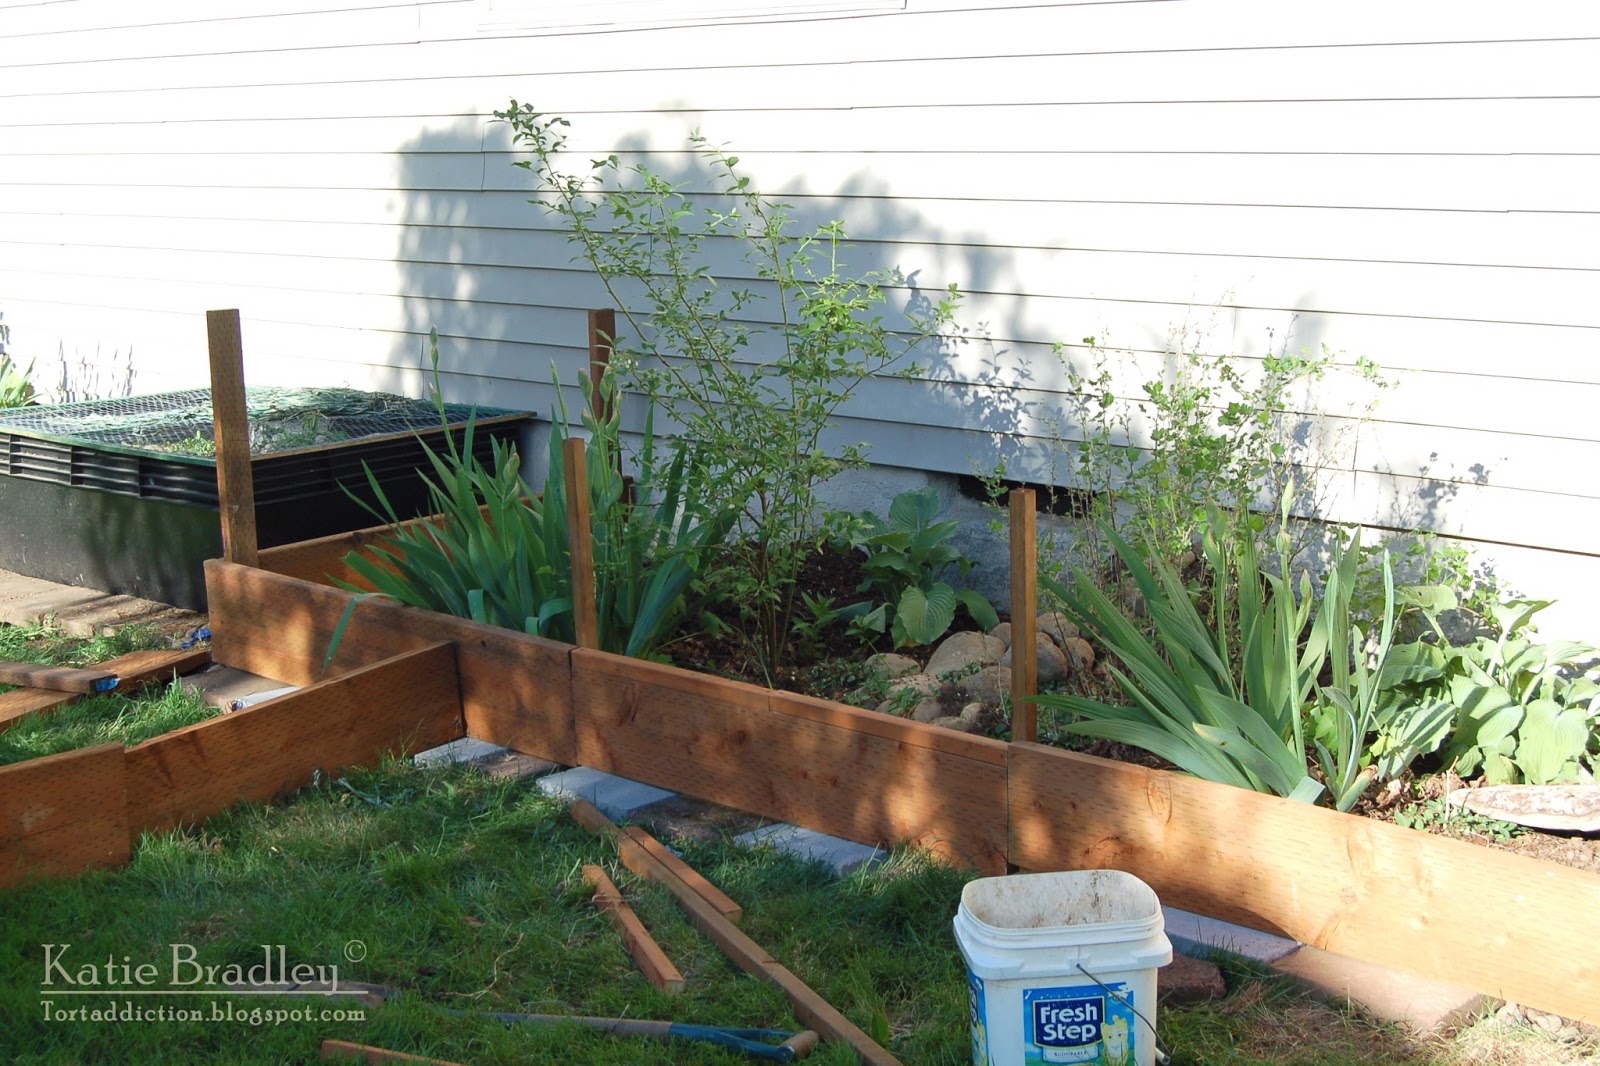
Step 2: Cut plywood (found in our garage) to the proper size of the back of the shelf for the floor.
I used the shelf boards for legs in a later step. To account for this, on the short ends I deducted the thickness of 2 shelves from the length (so the shelf is 48", and the shelves were each 5/8ths of an inch thick. So I cut the wood 1 1/4 inches smaller than the 48"). I'll explain why later. If you don't plan to make legs, don't worry about it, and just cut the wood to fit the shelf back exactly.
Step 3: Trace the outline of the cement mixing tub. I made mine a little fancier than it needs to be, with a cement mixing tub sunken into the middle, to provide deeper soil for Lady to dig in.
 |
| The cement mixing tub is optional... but nice! |
Step 4: Measure the 'lip' of the mixing tub and draw a line inside the traced line. This way when you cut the hole, the lip will rest on the wood, and the tub will be sunken through the hole.
 |
The darker line is the inside line, where the hole will be cut.
The outside (lighter) line is where I traced around the tub. |
Step 5: Ask a friend who has a jig saw to cut the hole into the wood. (That's right, I out-sourced) The drywall-cutting attachment of a Dremel would work fine for this, too... but I happened to have a friend with a jig saw handy.
Step 6: Use a belt sander or file to smooth the edges of the hole, so that the tub slides smoothly into it. You want the edges to be completely flush. I drew the inside line a little too small, so this was more work than it needed to be. After you finish, sweep off the board so there is no sawdust left on it.
Step 7: Attach the flooring material.
Using a good adhesive, glue down some vinyl flooring. I found some vinyl bathroom floor in our attic that worked fine. For previous projects I went to the local non-chain carpet store, and bought a huge remnant piece for $12. That was enough to cover the floors of several tortoise tables.
Measure the size of the vinyl first. You will need to place the shelf walls on the floor floor board (the way it will be later when assembled) and trace the line up to where the vinyl needs to go at the edges. It needs to stop before it touches the inside walls of the enclosure. The adhesive (I used Tuff Stuff) will likely need to dry for 24hrs. I put cement pavers on it to help weight it down.
Step 8: Attach the floor of the enclosure to the shelf using wood glue as well as screws. First position it correctly, so that the shelves that you will use as legs fit nicely on each end. The 'pretty' side of the shelf wood facing out, it should fit flushly. You can see what I mean in the picture in step 9.
Make sure you drill pilot holes for the screws.
Since I wanted to have the cement mixing tub, which I knew would be heavy, I built a little frame out of 1x2s that I happened to have in our garage. I drilled pilot holes through this little frame, and attached the floor to the shelf walls with screws that go through the 1x2s, through the floor, into the shelf walls.
Step 9: Using the shelf boards, make legs! :)
I used screws (from the inside side) to attach the two shelves (pretty side out) to the 1x2 of the little frame I built. I also used L-brackets at the corners for extra stability. I was going to attach little 1x2 legs behind the 'shelf legs' but found that it was so sturdy, this wasn't necessary. *click on the picture to see a larger version
 |
| The tortoise table is upside down, this is the bottom. |
If you look closely, you will see that I attached a skinny little 1x2 piece as an additional leg in the middle. I didn't want to risk the weight being too much for the floor to support. I used an L-bracket.
Step 10: Sealing the edges. This is done to protect the wood from moisture (substrate, excrement, water dish spills etc).
First, flip the table over so it is right-side-up. It already looks pretty awesome, don't you think?
In previous tortoise tables, I used silicone caulking to seal the edges. I didn't have caulk on hand today, and wanted to forge ahead with the project, so I went on a search for alternative solutions in our garage. I came up with this 'Shurtape' which is the modern new-and-improved version of duct tape (
Random fact: did you know that traditional duct tape is not supposed to be used for ducts any more?! It has been deemed a fire hazard, and it also turns un-sticky with temperature fluctuations). Shurtape is AWESOME because it sticks for about 1000 years, even in different temperatures. Unrolling carefully as I stuck it on, I coated each edge. The tape folds nicely in the corner between the floor and the wall, I cut it at each vertical corner. Then I put a second small piece into each vertical corner, so that the edges were flush. I cut small pieces for the rounded corners of the hole, too.
Then I ran one more layer of tape along the bottom of all 4 walls, all one piece. This way the substrate won't damage the walls.
 |
| The edges are taped with Shurtape. |
This was so much quicker and easier than caulking... though not as pretty. I used the handles of the scissors to smooth the tape, to make sure it stuck to all the little bumps of the vinyl flooring and the wood.
Step 11: Insert the tub! Lady is a very large female, and I hope some day she will lay eggs. Providing her with deep soil to dig in will also be fun for her, since Russian tortoises love to dig and burrow.
 |
| The tub is in! |
Step 12: Using Shurtape, tape around the edge of the tub, attaching it firmly to the floor of the tortoise table, as well as sealing the crack so no substrate etc. can fall through. Darn, I was so eager to finish that I forgot to take a picture.
Step 13: Put in substrate (I chose to use organic soil, but coconut coir, bought as bricks and mixed with water, is a great choice, too). Put some flat rocks in the basking area, and a water dish. I like using pyrex baking dishes or pie pans (from Goodwill) since they are shallow enough for the tortoise to get out, and easy to wash. I still need to put some river rocks around the water dish to help keep the substrate out of it.
 |
Almost done.
I will put in river rocks around the water dish tomorrow, as well as properly attaching the lights. |
Step 14: Using one of the shelf boards, make a little hide house. I used the pegs that had originally held the shelf up. I just inserted them so the shelf is held up horizontally, and slid it in. I'll cut a small piece of wood to cover part of the front later. For now I also put Lady's little cardboard hide, just to give her something she was familiar with.
Step 15: Attach lights (I still need to attach a 'gallows' type contraption so I can safely suspend the basking lamp above Lady's basking spot - but it was late, so I just clamped the lamp to the edge for today. I also need to attach the UVB lamp properly.
Step 16: Insert tortoise! ;)
 |
| Lady seems to really like her new space! 100% better than the old mixing tub... |
I hope this helps, and that you have fun!
The REALLY easy version of making an enclosure out of a shelf can go as follows: Get shelf. Take out shelves. Line inside with a tarp or pond liner, attached with Shurtape and staple gun. Put in substrate. Attach lights. Put in tortoises.
Ps: If you have the space, you could use a really large shelf. I wanted to use a 6ft long shelf, but the husband objected to giving up that much real estate of the living room floor. I didn't want to push it, since he so kindly 'lets' me have all these tortoises... So 3ft x 4ft had to do. A longer shelf would probably need more support framing, if you choose the option of sinking the cement mixing tub into the floor. Or you could make a 2x4 wooden frame to hold it up. I also know people who just used cinder blocks.